React Pos
React POS System 🛒💻
This is a React-based POS (Point of Sale) system that took me hell lot of time to make. It's a modern, full-featured POS that won't make you want to throw your computer out the window... most of the time. 😅


💡 Pro Tip (for all you hustling devs out there): There's always a certain breed of developers who dream of quick riches, and POS systems just happen to be the fastest way to turn code into money. Not saying anything... but iykyk. 😉
✨ Features
🔐 Authentication
- Email Sign Up & Log In
- OTP Verification
- Password Recovery
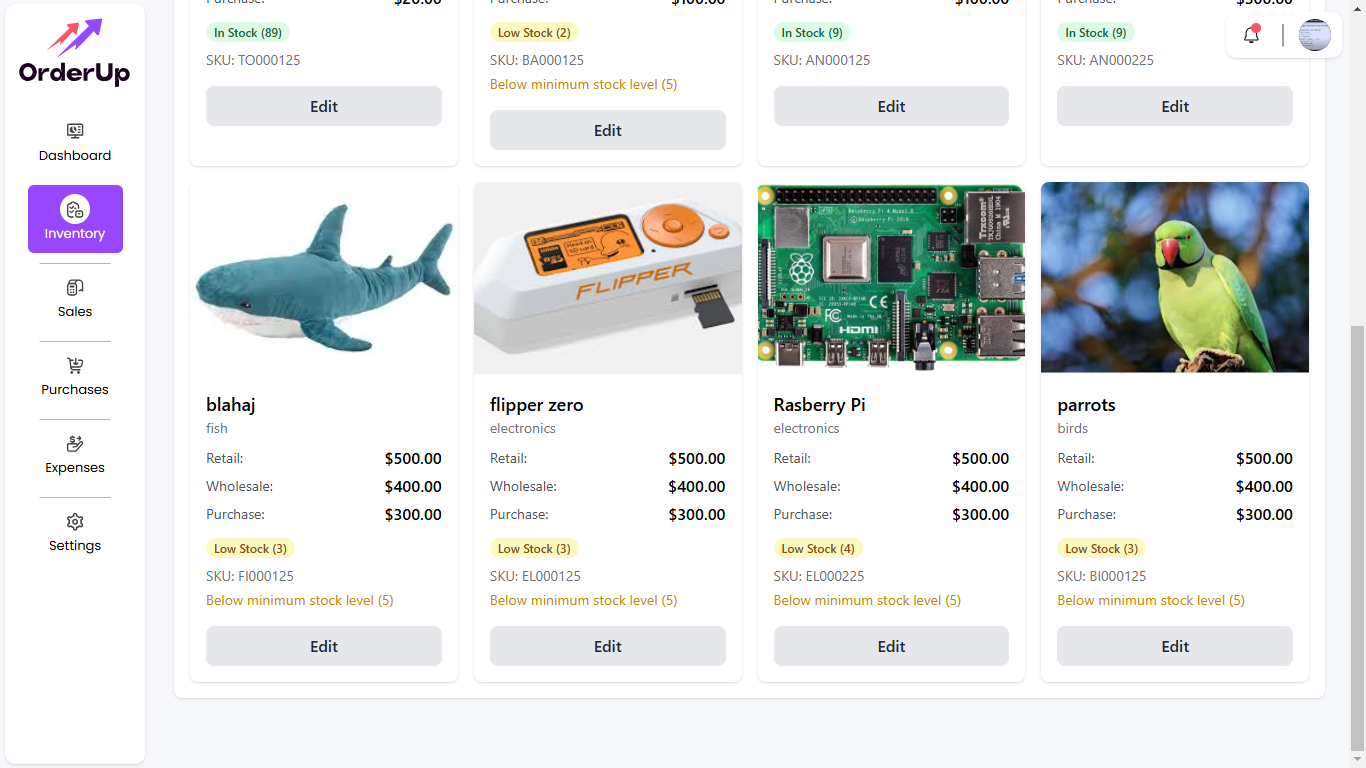
📦 Inventory Management
- Add, Edit, and Delete Products
- Track Stock Levels
- Set Minimum Stock Alerts
- Import/Export Excel Functionality
- SKU Generation
- Multiple Price Points (Retail/Wholesale)
💸 Sales
- Quick Product Search
- Cart Management
- Multiple Payment Methods
- Discount Handling
- Receipt Generation
- Sales History
🛍 Purchases
- Stock Purchase Tracking
- Supplier Management
- Purchase History
- Cost Tracking
💰 Expenses
- Expense Tracking
- Category Management
- Expense Analytics
- Monthly Reports
📊 Dashboard
- Sales Overview
- Low Stock Alerts
- Recent Transactions
- Daily Totals
⚙ Settings
- Coming soon!
🚀 Getting Started
Because we all love spending hours setting up projects, here's how to get this bad boy running:
- Clone the repo (if you can figure out Git)
- Run
npm installand pray to the dependency gods 🙏 - Rename
sample.envto.envand fill in your Appwrite IDs.
🏗️ Appwrite Setup
Create a new project in Appwrite (the easy part)
Create a database with these collections (here comes the fun):
inventory: For your precious productssales: Where the money magic happenspurchases: For tracking where your money goesexpenses: For crying about where else your money goesusers: For those brave souls using your system
Each one of these should have two attributes:
userId&data. Don't think too much about it—just do as I say, and your life will be easy. 🙄Remember to set permissions for anyone to create, read, update docs in here: (hehe)

Create a storage bucket for profile pictures (because everyone loves a good selfie)
Enable email/password authentication (keep those hackers at bay!)
Integrate a platform:
- Set your platform to
localhostfor development. - Update it to your domain name when deploying (e.g.,
https://yourdomain.com).
- Set your platform to
Update your
.envfile with all those lovely IDs.
Now you're ready to run npm run dev and watch your creation come to life! 🎉
🎨 Figma File
Figma File. Dev mode is turned on.
🛠️ Libraries & Frameworks Used
- Appwrite
- React
- React Router
- Redux
- Tailwind CSS
- Vite
- react-otp-input
- recharts
- xlsx-js-style
- react-to-print
- react-toastify
- browser-image-compression
- Vercel
- DriverJs
Don't freak out—these also include some packages. 😅
🙌 Credits
- Icons from Flaticons (because who has time to make their own?)
- Shoutout to Bolt, ChatGPT, and CoPilot for helping throughout the project. 🤝 (what the hell am I doing?)
📜 License
Licensed under MIT, so I won't be responsible if it breaks or someone messes up the database. 😎